
By Iouri Apanovitch, Senior Technical Training Engineer, Rand 3D
The built-in CATIA video recorder is an essential tool when working with animations in kinematics, fitting simulator, human modeling, etc. When the default video settings are used, however, the resulting video files are quite large, making them difficult to share through a company.
Here’s how to control the video file size in CATIA V5.
Before starting the recording, select (Setup) icon to open the Video Properties dialog box, at the top of which you will see the Format pull-down list.
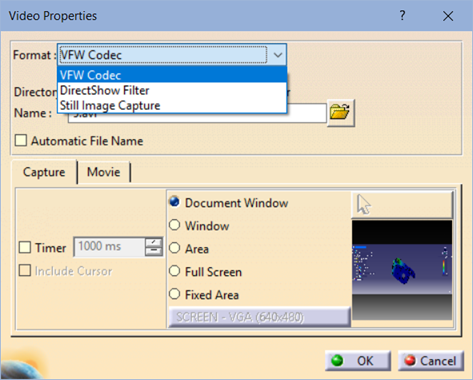
The default VFW Codec option records the video in an uncompressed AVI file. It provides the best video quality, at the cost of a very large file size. A one-minute-long video can be as large as 2Gb or more.
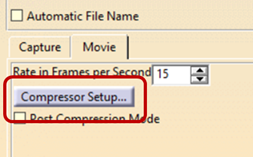
The DirectShow option lets you create smaller, MPEG-compressed files. Select the Movie tab and click Compressor Setup button to open the compression options.
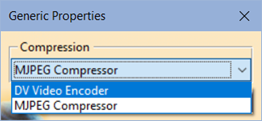
If you don’t see the two compression options shown above (DV Video Encoder and MJPEG Compressor), it means that you need to install the codecs. To do that, run the file 3DSMJPEGVFWSetup.exe located in the \code\bin sub-folder of the CATIA install directory.
Using either of the two codecs creates smaller files, of course at the cost of quality. The MJPEG Compressor results in the smallest files.
You can also use the Rate in Frames per Second (FPS) setting to further reduce the file size. However, be aware the very low FPS rate may result in your video appearing ‘jerky.’
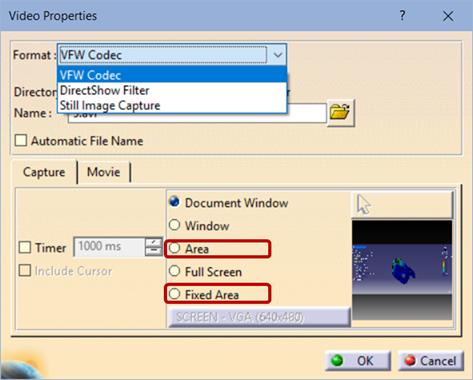
Lastly, you can use either Area or Fixed Area options to limit the captured area and to reduce the file size even further.
The final recommendation – test the settings by yourself on a sample recording, to make sure you hit the right balance between the video quality and the file size.
About the Author
Iouri’s primary area of expertise is product analysis and simulation with FEA tools such as SIMULIA/Abaqus, Autodesk Simulation, Mechanica, including linear and non-linear simulations, dynamics, fatigue, and analysis of laminated composites.
Leave a Reply
You must be logged in to post a comment.